


Request a free quote Phone Icon
die cutting materials

Blog

10 Tips for Choosing an Automatic Labeling Machine?

Choosing an Automatic Labeling Machine can shape your packaging speed, product appearance, and daily operating costs. The right equipment should match your container size, label material, production volume, and workplace conditions. A machine that performs well on round bottles may struggle with flat cartons or flexible pouches. Small differences matter.

In real production, operators notice details that brochures often miss. Can they adjust the guide rails without tools? Does the label roll unwind smoothly during a long shift? Is the touch screen clear when dust covers the control panel? These practical questions reveal whether a machine is genuinely reliable. We will examine ten important selection points, including application accuracy, machine speed, label compatibility, changeover time, sensor performance, maintenance access, and technical support.

Experience also teaches caution. A higher speed rating does not always mean higher output. Frequent stops, difficult adjustments, or wasted labels can reduce productivity. One overlooked issue is future flexibility. Your current bottle may be 250 milliliters, but new packaging could arrive next year. Plan for change.

This guide combines technical considerations with observations from everyday packaging work. It does not promise a perfect purchase. No machine is perfect. Instead, it helps buyers compare specifications with real operating needs, test equipment carefully, and ask better questions before investing. A dependable Automatic Labeling Machine should deliver consistent placement, protect product presentation, and remain practical for the people who use it every day.
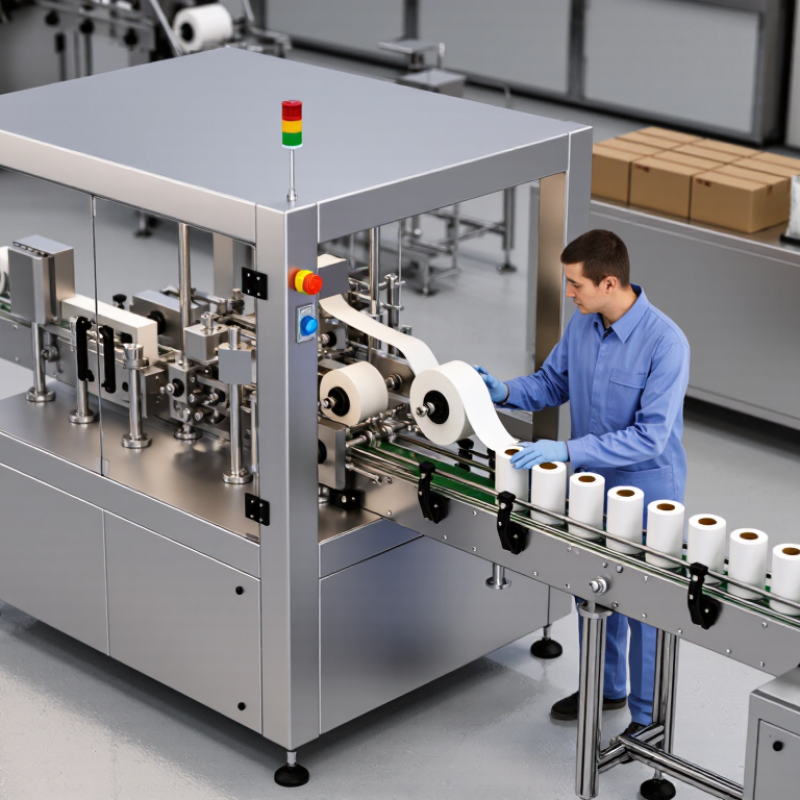
10 Tips for Choosing an Automatic Labeling Machine?

Define Your Labeling Requirements and Production Goals

Before comparing automatic labeling machines, define the production problem in measurable terms. Record product dimensions, label material, adhesive type, container shape, line speed, and daily volume. Include peak demand, not only today’s average. Deloitte’s 2024 Smart Manufacturing and Operations Survey found that 86% of manufacturing leaders consider smart manufacturing important for competitiveness. That value depends on clear operating targets.

Translate those targets into machine requirements. Specify labels per minute, placement tolerance, changeover time, reject handling, and integration with conveyors or inspection systems. A practical trial should run actual products, full label rolls, and realistic humidity conditions. McKinsey reported that about 70% of IoT initiatives struggle to move beyond the pilot stage. Vague goals often create that problem.

Ask operators to describe the difficult moments. Small containers may rotate, dusty surfaces may reduce adhesion, and frequent format changes can erase expected labor savings. Measure downtime during changeovers. Measure waste, too. A machine rated for 200 products per minute may perform differently with short labels or uneven containers. Do not trust a brochure alone. A spreadsheet can miss awkward access, noisy alarms, or a roll that is difficult to load. Leave room for doubt, then validate the specification during a witnessed factory test.

Match Machine Types to Product Shapes and Label Materials

Choosing an automatic labeling machine begins with the product, not the machine catalog. A round bottle usually needs a wrap-around labeling system with controlled rotation. Flat cartons often suit pressure-sensitive applicators with side belts or top belts. For tapered containers, test label placement at both the wide and narrow ends. Small jars can expose alignment errors quickly. In production trials, I measure container diameter, height, seam position, and surface stability before selecting equipment. A shiny curved surface may need a wipe-down station or a different application angle.

Label material changes the decision as much as product geometry. Paper labels can work well on clean, dry cartons, but moisture may cause lifting. Film labels handle damp packaging better, yet static can complicate feeding. For textured containers, choose adhesive and pressure settings that reach the low points. Clear labels demand accurate registration because trapped air and tiny shifts remain visible. Always test the actual label roll, including liner thickness, core size, and winding direction. Test the roll. A machine that accepts one roll may reject another.

Ask for a sustained trial, not a five-minute demonstration. Record speed, reject rates, changeover time, and label waste. Check whether operators can adjust guides without special tools. I once treated a minor taper as unimportant; it later caused repeated wrinkles. It changed my checklist. Measure the waste. Leave room for improvement, because real packaging rarely stays perfectly consistent. Choose sensors, conveyors, and applicators that match future formats, not only today’s fastest run.

10 Tips for Choosing an Automatic Labeling Machine: Match Machine Types to Product Shapes and Label Materials

Product-shape compatibility score from 1 to 5, based on typical label application requirements, surface geometry, and label-material handling.

Wrap-around machines are generally the best fit for cylindrical products, while front-and-back systems suit flat cartons and cases. Wipe-on and tamp-blow systems offer greater flexibility for oval, irregular, and pouch-shaped products. Smooth paper and film labels typically provide the most reliable application performance; textured or highly flexible materials may require additional testing.

Evaluate Speed, Accuracy, and Application Performance

When choosing an automatic labeling machine, judge real output rather than the advertised maximum speed. A machine rated at 120 labels per minute may slow considerably with small containers or uneven surfaces. Ask for a live trial using your actual products, labels, and conveyor speed. Measure labels per minute, setup time, and rejected items. Speed matters only when accuracy remains stable.

Check placement tolerance from the first container to the last. Even a two-millimeter shift can affect scanning, sealing, or shelf appearance. Review sensor response, label tension control, and container stabilization. Confirm whether the system handles glass, plastic, tapered shapes, or flexible pouches. Application performance depends on adhesive behavior, surface cleanliness, temperature, and humidity. Cold containers can create surprising failures. They deserve testing.

A practical evaluation should include ten details: operating speed, placement accuracy, product range, label dimensions, changeover time, reject rate, control simplicity, cleaning access, maintenance needs, and operator training. I once saw a fast machine lose efficiency because adjustments were difficult between short production runs. That experience changed my view of speed. Ask for recorded test data, not only demonstrations. Inspect labels after several hours of continuous operation. A reliable machine should maintain alignment when rolls become smaller and production conditions shift. Real factories are rarely perfect. Your trial should reflect that.

Check Integration, Operation, Maintenance, and Safety Features

When choosing an automatic labeling machine, inspect how it will join your existing line. Check conveyor height, product spacing, label dimensions, and available floor space. The machine should communicate smoothly with sensors, controllers, printers, and inspection equipment. Confirm its communication protocols before purchase. A promising machine can become expensive if integration requires major redesign.

Operation should feel clear during a busy shift. Look for a readable control panel, quick recipe changes, and simple adjustments for different containers. Test it live with your actual products and labels. Watch for wrinkles, slipping, missed labels, and unstable positioning. Ask operators to perform a changeover. Their feedback often reveals problems that a sales demonstration hides. Keep it simple.

Maintenance details deserve equal attention. Inspect access to rollers, applicator heads, sensors, and adhesive-contact areas. Tool-free cleaning can reduce downtime, but only if the parts are durable. Request a maintenance schedule, spare-part list, and fault-code guide. Safety features must include guards, emergency stops, clear warning labels, and safe restart controls. Verify that the equipment supports your workplace risk assessment and required safety procedures. Do not assume compliance from appearance alone. A small oversight here may affect every shift. Reflect on total ownership cost, not only the purchase price.

10 Tips for Choosing an Automatic Labeling Machine — Check Integration, Operation, Maintenance, and Safety Features

No. Selection Tip What to Check Useful Reference Data Practical Questions Why It Matters
1 Match the Product and Label Format Confirm product shape, surface material, container diameter or width, label dimensions, label gap, liner thickness, and application position. Common pressure-sensitive labels use a continuous liner and a defined gap between labels. Cylindrical, tapered, flexible, and irregular products may require different applicator designs. Can the machine handle the smallest and largest product in the range without changing the main applicator? Poor product compatibility can cause wrinkles, skewed labels, missed applications, and frequent adjustments.
2 Verify Required Throughput Compare the machine’s rated speed with the actual conveyor speed, product spacing, label length, and planned production rate. Automatic labeling systems may range from low-speed intermittent operation to more than 100 products per minute, depending on product type and application method. Is the stated speed measured with the same product, label size, and accuracy requirement that we use? A nominal speed without a realistic product test can result in bottlenecks and unstable labeling quality.
3 Check Line Integration Review conveyor height, direction, available floor space, product sensors, upstream and downstream equipment, and control-system interfaces. Typical integration may use digital I/O, encoder signals, barcode or vision triggers, and industrial Ethernet communication, depending on the line architecture. Can the machine exchange run, stop, fault, product-count, and reject signals with the existing line? Good integration reduces manual intervention and helps prevent product accumulation or unplanned line stops.
4 Evaluate Labeling Accuracy Define allowable vertical and horizontal placement tolerance, label orientation, repeatability, and reject criteria. A practical acceptance target is often specified in millimeters, such as ±1 to ±2 mm, but the achievable result depends on product stability, label quality, speed, and machine setup. Will a documented acceptance test measure placement accuracy over a representative production batch? Consistent placement supports appearance, barcode readability, regulatory information, and downstream inspection.
5 Assess Changeover and Operation Look for recipe storage, clear settings, tool-free adjustments, position scales, guided setup, and quick-release components. Changeover time varies widely; a well-defined product family and stored recipes can reduce repeat setup work and operator errors. Can an operator select a validated recipe and complete a routine changeover without engineering support? Fast, repeatable changeovers improve equipment utilization and are especially valuable for short production runs.
6 Review Controls and Data Features Check the human-machine interface, user permissions, alarm history, production counters, batch settings, and data export capability. Useful control features include multi-level access, fault messages, recipe management, total counts, good counts, reject counts, and resettable shift counters. Can supervisors identify the cause and duration of stops without connecting a separate diagnostic device? Accessible operating data supports troubleshooting, training, traceability, and continuous improvement.
7 Plan for Maintenance Inspect access to rollers, peel plates, sensors, belts, drive components, lubrication points, electrical panels, and label-roll loading areas. Routine cleaning, inspection, sensor alignment, belt condition checks, and replacement of wear parts are normal maintenance activities. Are preventive-maintenance intervals, spare-parts lists, service procedures, and troubleshooting guides included? Easy maintenance helps reduce downtime and keeps label placement stable over the equipment’s service life.
8 Confirm Safety Protection Check guarding, interlocked access doors, emergency stops, safe restart behavior, pinch-point protection, warning labels, and electrical safety documentation. Safety functions should be assessed through a documented risk assessment and validated against the regulations applicable to the installation location. Does opening a guarded area stop hazardous motion, and does the machine require a deliberate reset before restart? Effective safeguards protect operators during normal production, cleaning, setup, and fault recovery.
9 Check Environmental Suitability Review washdown exposure, dust, humidity, temperature, chemical contact, compressed-air quality, and the required enclosure protection. Ingress-protection requirements vary by area. A higher IP rating may be appropriate for wet or washdown zones, but the complete machine and installed components must be evaluated. What cleaning chemicals and procedures will be used, and are all exposed materials compatible with them? The correct environmental design reduces corrosion, sensor faults, electrical failures, and premature wear.
10 Compare Total Cost of Ownership Include purchase price, installation, commissioning, training, tooling, labels, spare parts, energy, maintenance labor, software, and planned upgrades. A lower initial price may not produce the lowest operating cost if changeovers are slow, wear parts are difficult to obtain, or service access is limited. What are the expected consumables, critical spare parts, service response arrangements, and operator-training requirements? Total-cost analysis reveals the long-term financial impact and supports a more reliable investment decision.
Evaluation Note: Final performance should be confirmed with a site-specific test using the actual product, label stock, conveyor conditions, operating speed, and required quality tolerances.

Compare Total Costs, Suppliers, and Long-Term Support

10 Tips for Choosing an Automatic Labeling Machine

An automatic labeling machine should be judged by its total cost, not its purchase price.

Tip 1: List every operating expense. Include electricity, compressed air, replacement rollers, change parts, labor, and label waste. A machine that saves three seconds per bottle may still cost more when setup takes forty minutes. Measure your real production speed. Do not trust only the brochure.

Tip 2: Compare suppliers by evidence, not promises. Ask for a live test using your containers, labels, adhesive, and line speed. Check alignment after several hours, not just ten minutes.

Tip 3: Request a clear quotation with installation, training, shipping, taxes, and future modifications included. Hidden costs appear easily. A low quote can be incomplete.

Tip 4: Examine long-term support. Ask how quickly technicians respond and whether critical spare parts remain available. Review the warranty in writing. Confirm remote assistance, preventive maintenance, and operator training. In my experience, small sensors and rollers often cause frustrating delays.

Tip 5: Speak with two or three current users, if possible. Their feedback may reveal noise, cleaning difficulty, or unreliable software. Suppliers deserve careful evaluation, too. I once underestimated training time, and production suffered for several days. That mistake still matters. Choose equipment that your staff can operate confidently, not merely machinery with impressive specifications.